
Google Analytics 4 (GA4) is Google’s brand new analytics platform which seeks to combine three leading technologies: Firebase Analytics, Google Signals and The Global Site Tag.
The new interface and enhanced capabilities of Google Analytics 4 can take some getting used to, but before you dive in, you may want to set up IP address filters. Filters aren’t ported over when you upgrade from Universal Analytics to Google Analytics 4, so this is an important first step to help keep your data clean.
Setting up IP filters in GA4 is slightly different to setting them up in UA, so even Google Analytics veterans may need a bit of help. Read on to find out how you can set up IP filters in Google Analytics 4.
1) Define the IP address
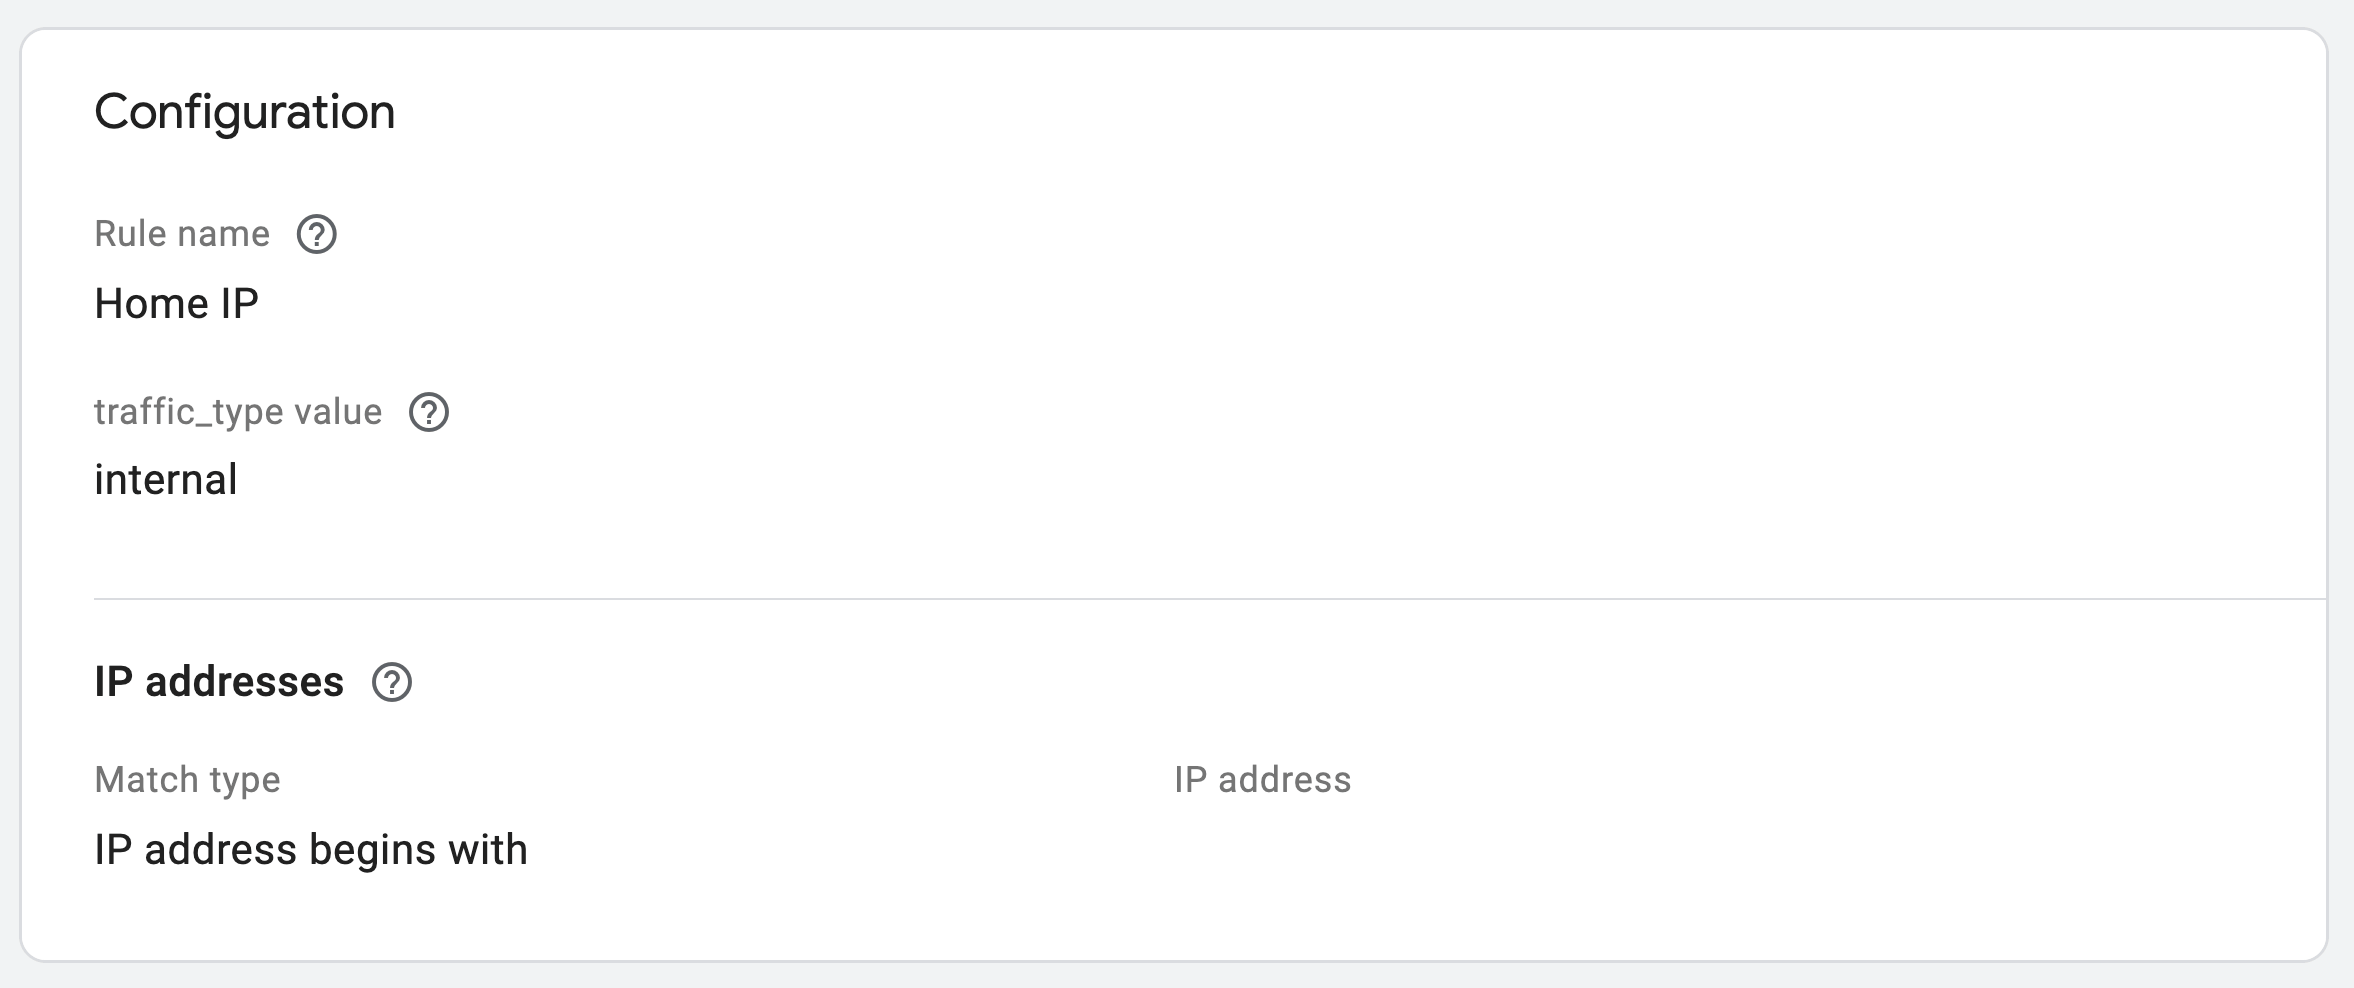
Before setting up the filter you’ll need to define the IP addresses that you want to exclude. To do this you’ll need to follow these steps from your GA4 property dashboard:
- Click ‘Admin’ and find Data Streams
- Within Data Streams select the data stream that you want to add IP filters to
- Click on ‘Tagging Settings’ within this data stream
- Select ‘Define Internal Traffic’
- Click the big blue ‘Create’ button
- Fill out the configuration settings:
- Rule name – can be any descriptive name for your defined IP
- traffic_type value – can be any value, but should be unique to differentiate between filters
- Enter the IP address you want to filter in the IP address field and select a relevant match type from the drop down
- Click the big blue ‘Create’ button again
2) Create the IP filter
Now you’ve defined your IP address you want to exclude, it’s time to create your IP filter. To do this you’ll need to go back to your GA4 property dashboard and follow the steps below:
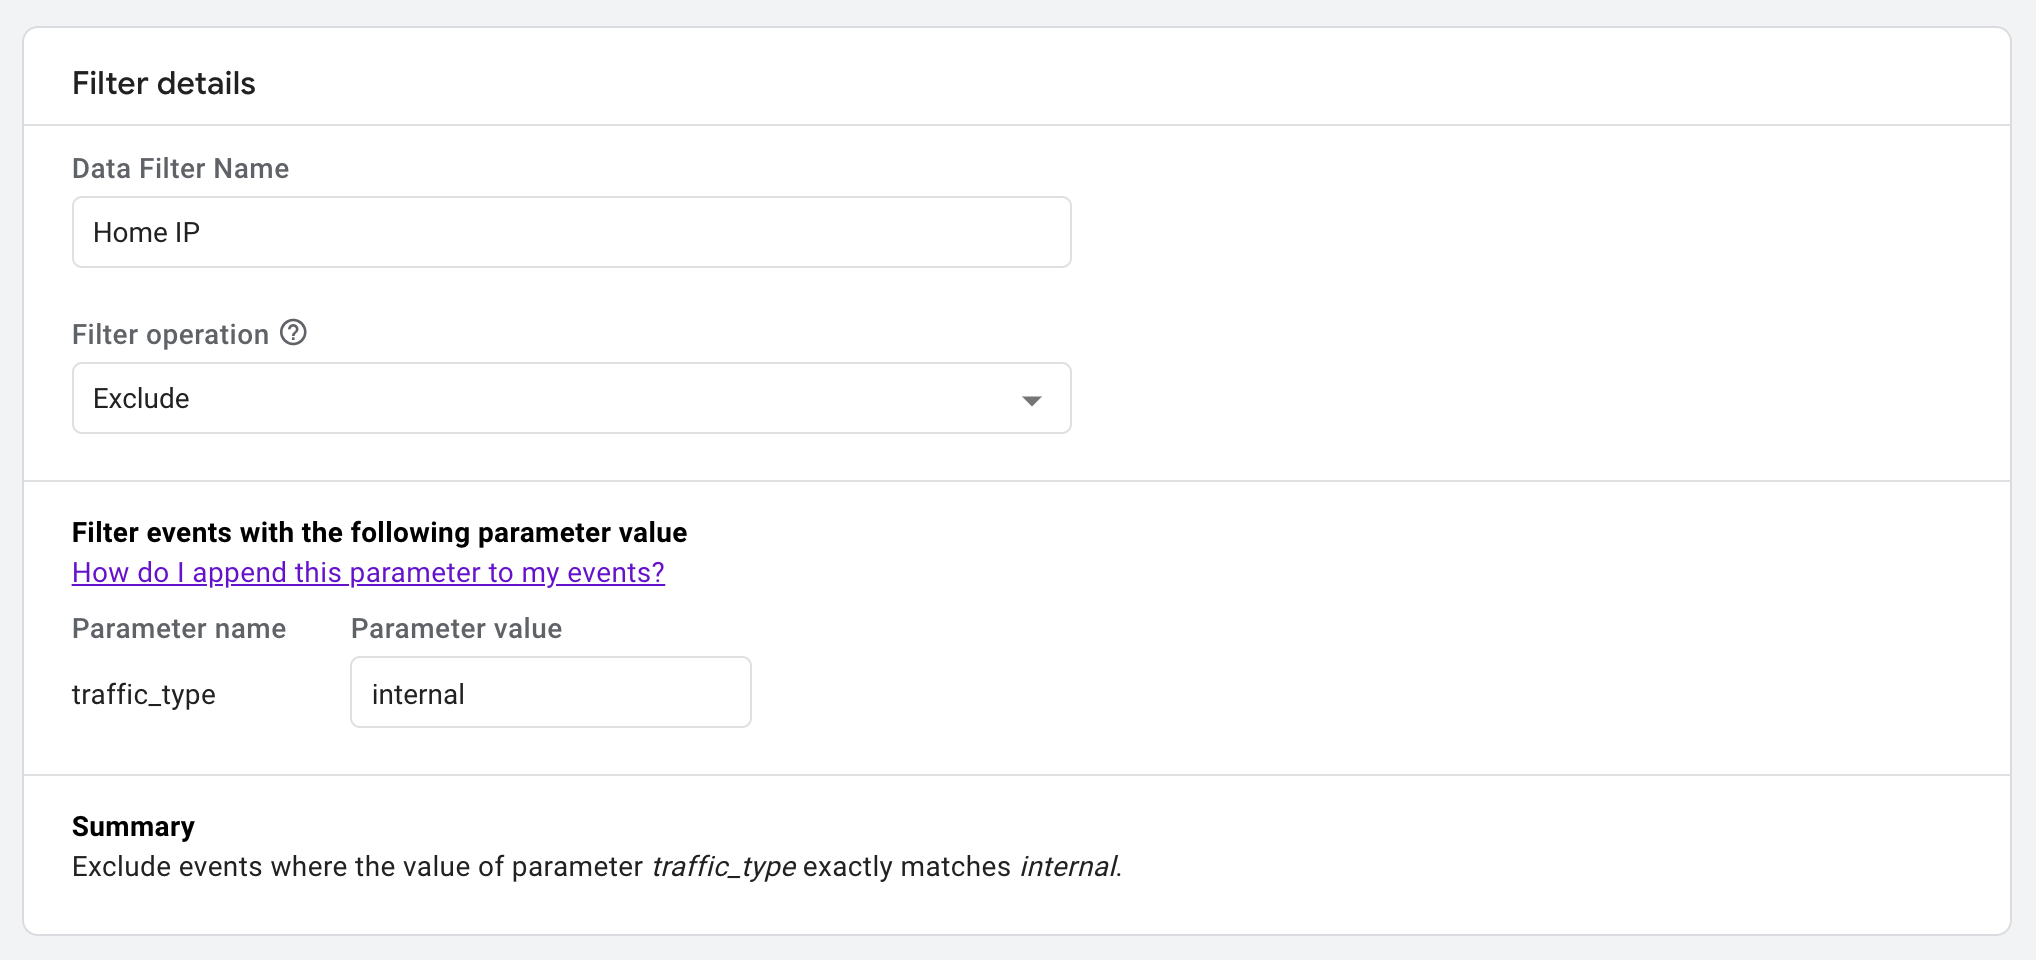
- Click Admin and find Data Settings, within the Data Settings accordion click on the link titled ‘Data Filters’.
- Within Data Filters click the big blue ‘Create Filter’ button
- Fill out the configuration settings:
- Select ‘Internal Traffic’
- Data Filter Name – can be any descriptive name for your definition
- Filter Operation – select ‘Exclude’ from the drop down
- Under Filter events with the following parameter value enter the traffic_type value you defined when defining your IP address in the parameter value field.
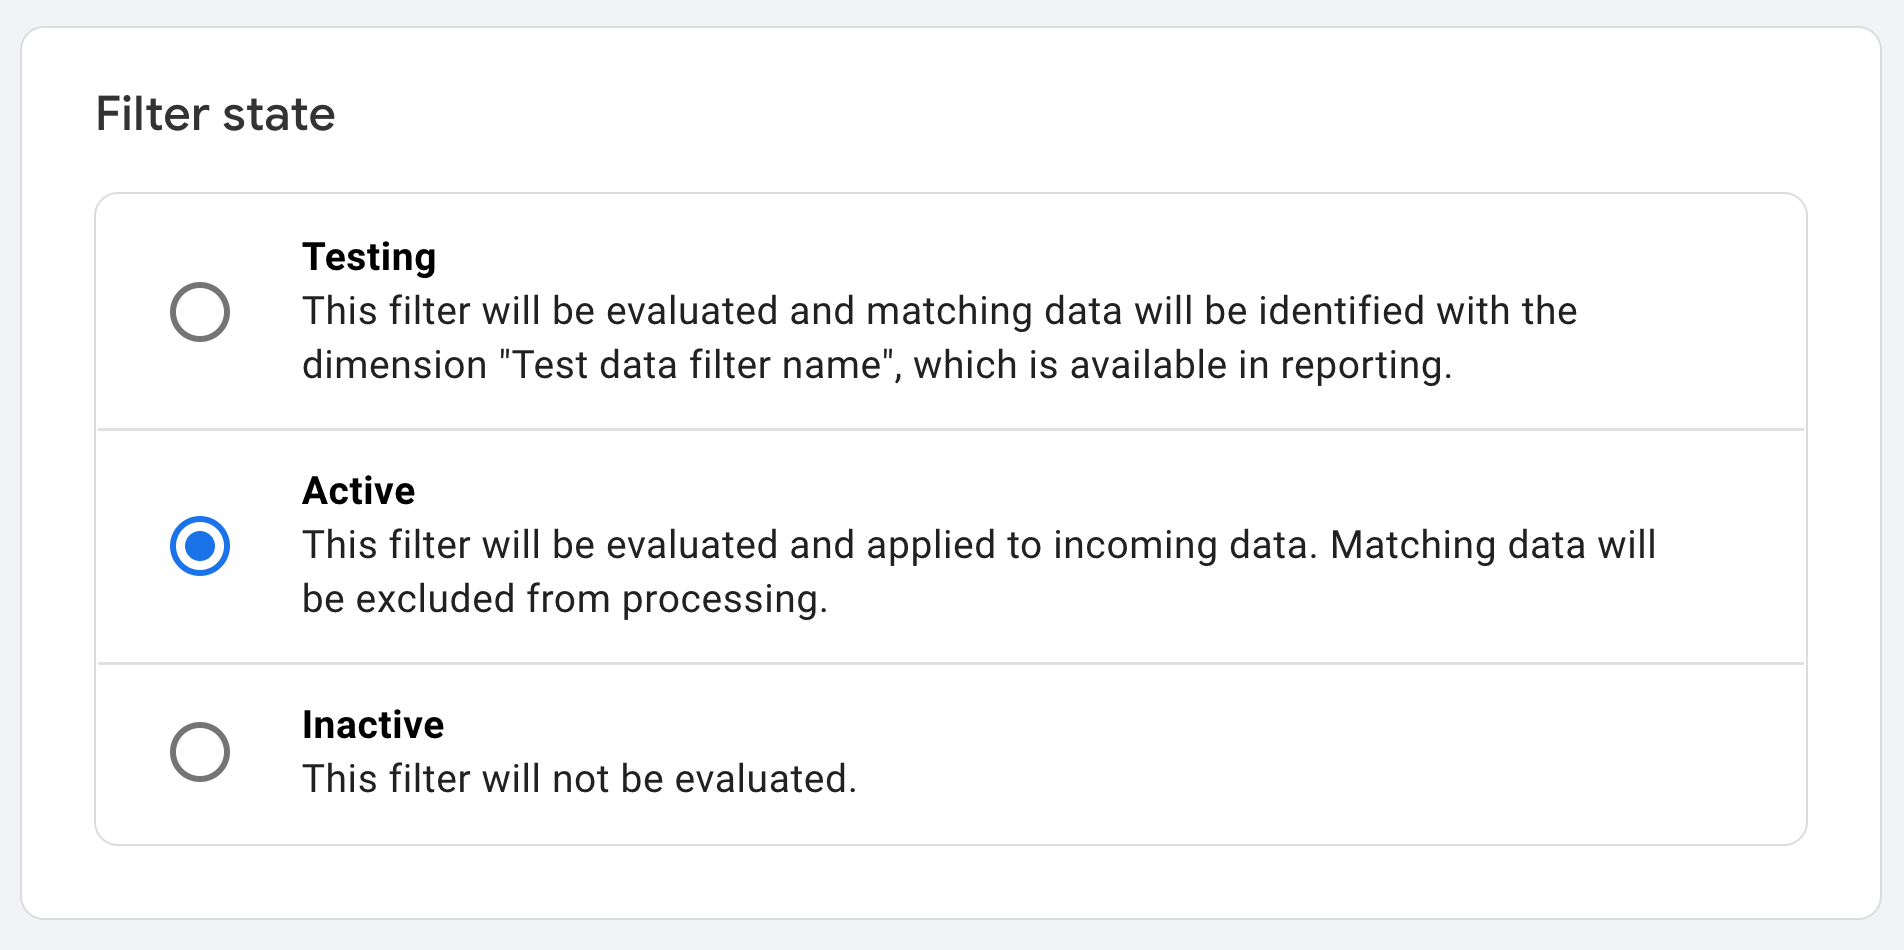
- Keep the filter state as Testing State for now, so you can test your filters before applying them permanently
3) Test the IP filter
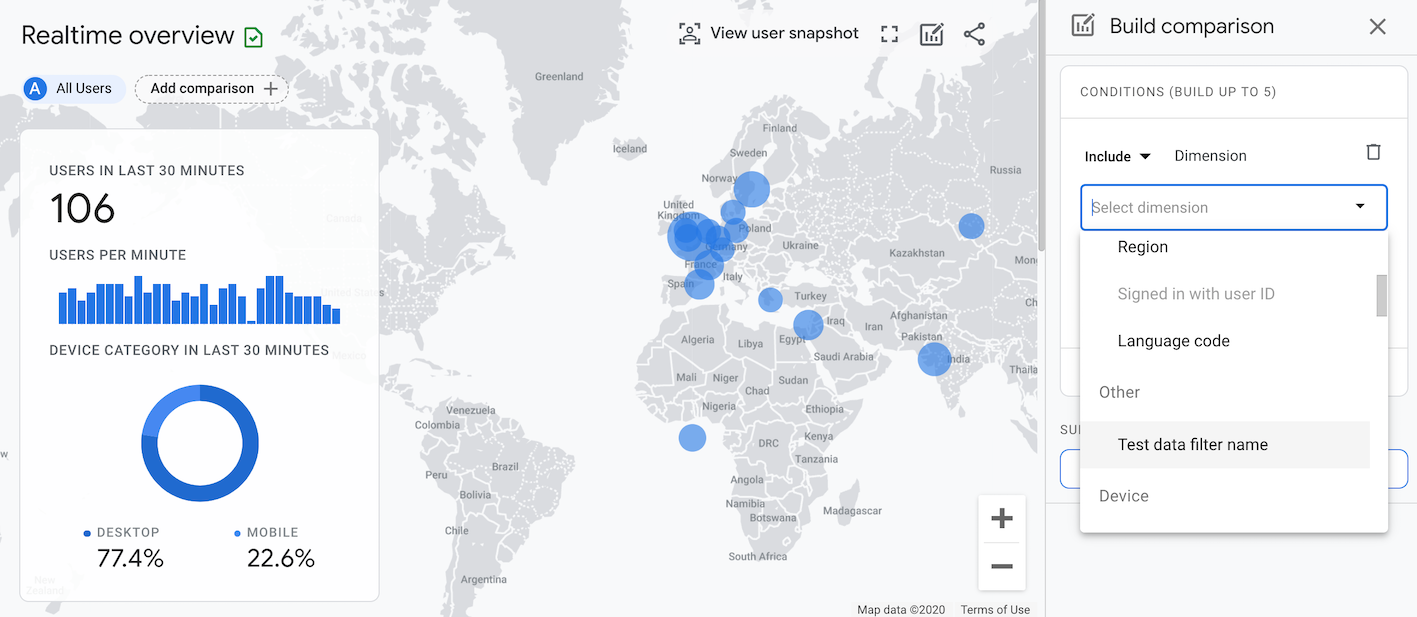
Your IP filter should now be set up correctly, but before applying this to GA4 you’ll need to test that it works. You can do this by going back to your GA4 dashboard and following the steps below.
- Select ‘Realtime’ and click on the ‘All users’ segment under realtime overview. This should bring up a menu to the right hand side titled ‘Build comparison’
- You want to exclude IPs, so ensure the dropdown at the top reads “Exclude”
- Select the dimension called ‘Test data filter name’ from the drop down and under dimension values you should see the filter you’ve just created
- Click on this filter, then click ‘OK’ and the big blue ‘Apply’ button at the bottom of the screen.
When you’ve applied the filter only internal traffic should be shown in the realtime overview. To double check that’s the case, add a second segment, but instead of excluding traffic, make sure you’re including it.
4) Activate the IP filter
Once you’re happy that the IP filter is working as it should be, go back to ‘Data Settings’ in the admin area and select ‘Data Filters’. From here you’ll be able to change the filter state to Active State which will permanently apply the filter to your GA4 property. Click ‘Save’ and you’re done!
If you need any additional support with setting up Google Analytics 4 then be sure to head to Google’s implementation guide, or contact a digital marketing consultant who will be able to help you get up and running.
)